Collect the right information at the right time with SilkStart's customizable signup process.
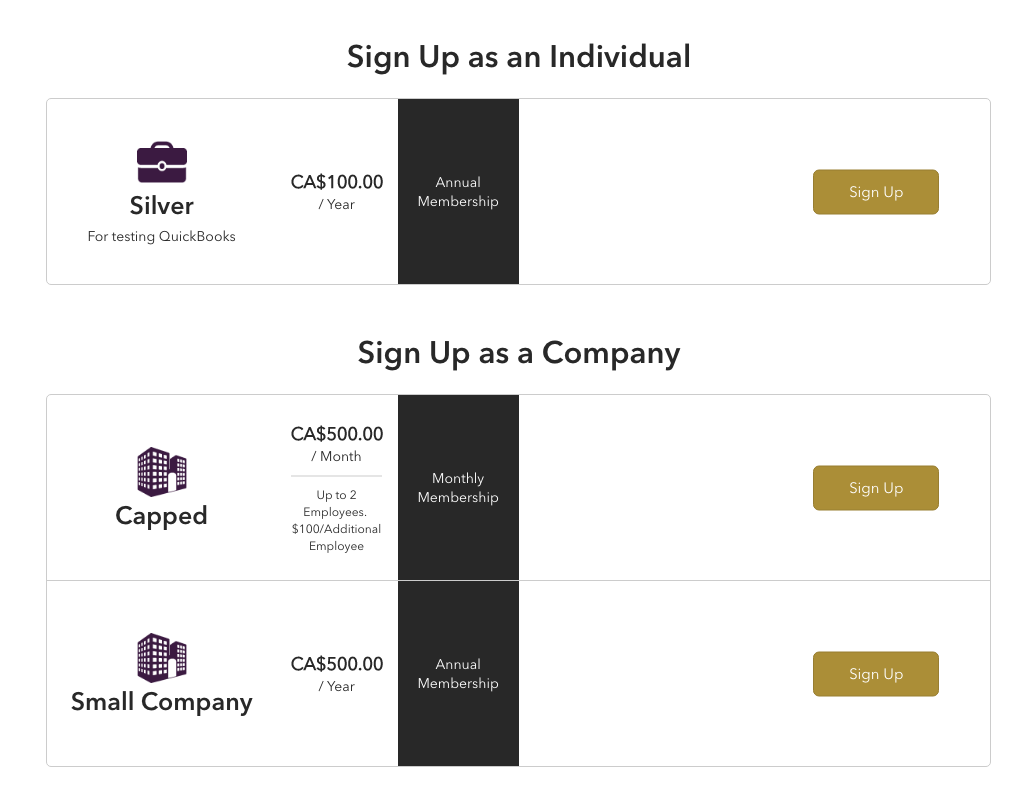
By default, SilkStart provides you with a Join page that lists your organization's plans - allowing your users to register online and provide their demographic and payment information.
Some elements of the registration (enrollment) process can be edited.
|
SilkStart Join Page Your SilkStart Join page will list your individual and company plans on one easy and intuitive page. After the user selects a plan, they will be sent into the enrollment process.
|
Edit your sign-up process
- Sign into your SilkStart admin panel.
- Go to 'Settings' > 'Enrolment Flow.'
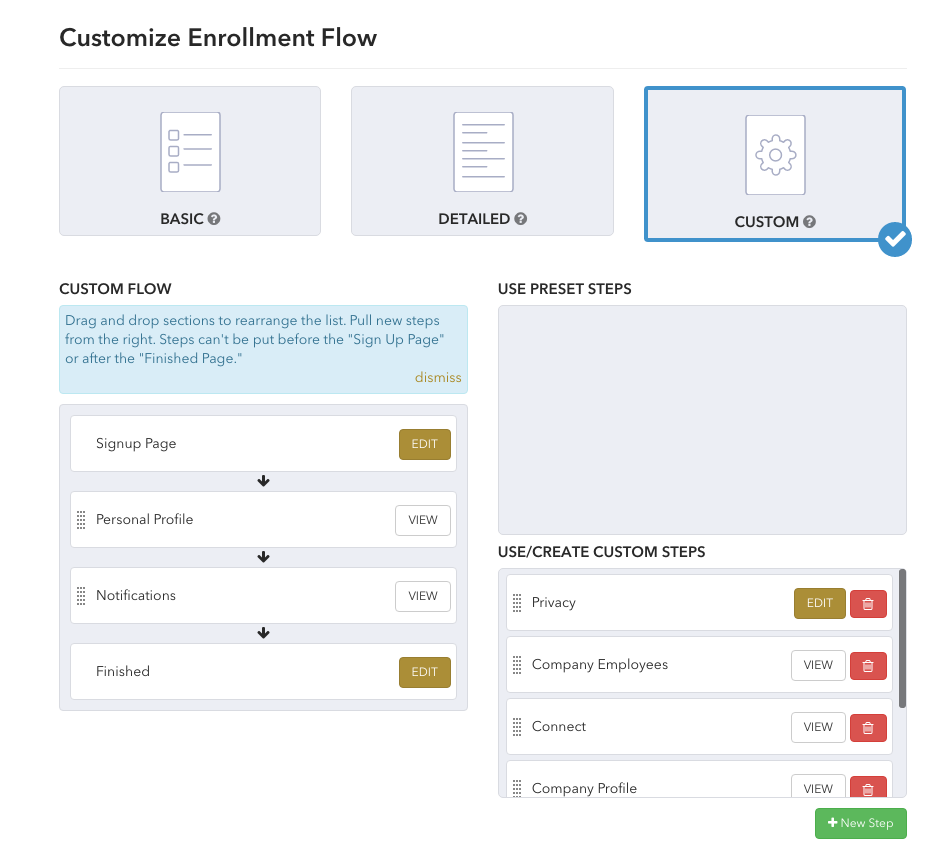
- Choose a preset option, or create your own custom process. The Basic preset includes only the most basic information, encouraging members to complete signup. The Detailed preset takes in as much information as possible.
- If you select the Custom enrolment flow, you'll see a series of steps that can be used in your signup process. Drag steps to the Custom Flow pane on the left to include them, and to the list on the right to remove them. Not sure what's included on a page? Click on View Page to see what your members will see.
- Some steps in the signup process can also be customized. Click on Edit Page to set these options.
How does the Custom Enrollment Process work?
If you have chosen the Custom Enrollment Process, SilkStart allows you to customize a selection of pre-configured registration pages. You may also choose what order these pages appear to the user that is registering.
 |
Enrollment Flow Options
- Personal Profile: This page collects basic profile information like name, work and/or home address.
- Notifications: The user may setup their notification preferences for your network. For example, if the member wishes to be notified by email each time someone posts in a Group they belong to, they may choose this here (The member may also change these settings in their Account Settings).
- Connect: Allows your members to sync their Facebook account so that they may use them to login in the future.
- Company Profile: The user may choose to register their company with your network or may choose to join a pre-existing company
- Disclaimer: Enter any text you wish into this step.
- Privacy: Members may configure their privacy settings in the member directory.
Where is the member sent after the registration process?
You may direct where the member is sent after they have concluded their registration process.
- If you want your member to be sent to their profile, enter /profile.
- If you want you member to be sent to a cpage, enter the cpage name
- Settings > Apps > People > After Join Redirect URL
- Alternatively, you may set this by selecting 'Edit' on the 'Finished' step of a custom enrollment flow.
How does this affect existing members?
Changing your enrollment flow will have no effect on your existing members until they renew their membership. Then they will go through the sign-up process again, and they will complete your new sign-up form.
I have custom fields setup on my site. Can I add these to the enrolment flow?
Yes, the sign-up form can be customized to your particular association based upon the information that you require. Contact your SilkStart Account Manager to add these custom fields. If you already have custom fields setup, you can simply add these to your sign-up process.
- Admin Panel > Settings > Enrollment Flow
- Select 'Edit Page'
- Choose 'Add Another Field'


Comments
1 comment
Please add help information as to the fields available within each enrollment option and if/how we can require certain fields and not others within that enrollment option.
Please sign in to leave a comment.